Note: To list your products, you must first purchase a membership. Click Here
This step-by-step guide will show you how to sell on Crax.Shop and list your digital products effectively. Follow these SEO-friendly steps to increase visibility and boost sales.
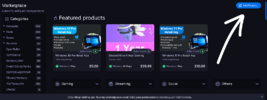
Step 1: Navigate to Add Product
Go to the Marketplace and scroll down. On the right-hand side, you’ll see the "Add Product" tab — click it to start your listing.

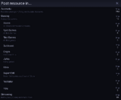
Step 2: Choose the Right Category
Select the category that best matches your product. Picking the correct category improves discoverability and helps buyers find your product.

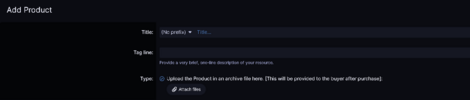
Step 3: Enter Product Details
Complete the main product fields carefully:
- Product Title – Clear, keyword-rich, and descriptive.
- Prefix – Pick the appropriate prefix for your listing.
- Short Description – One catchy line that summarizes the product.
- Upload Product – Attach the digital file(s). Files will only be delivered to buyers after the purchase completes.

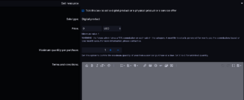
Step 4: Set Pricing & Sales Options
We currently support digital products only. Configure sales settings:
- Price – Set your price (admin commission applies).
- Quantity – Max purchases per buyer. Set to 0 for unlimited sales.
- Terms & Conditions – Add any usage rules or restrictions.

Step 5: Warranty & Required Information
Provide the mandatory details that protect buyers and sellers:
- Warranty Period – Select warranty days (payouts can be withdrawn only after the warranty expires). This protects buyers and prevents premature withdrawals.
- Email Access & Verification – Include required email access or verification instructions if your product requires account/email setup.
- Product Origin – State where the product originates (e.g., region, source).
- Other Required Info – Any license keys, activation steps, or special instructions buyers need to use the product.

Step 6: Add the Cover Image (Thumbnail)
The product thumbnail (cover image) is handled from the resource page after the resource is created:
- Open your newly created Resource Page.
- From the options menu select "Add the Cover Image".
- Once added, that option will change to "Edit resource image", allowing you to update or replace the thumbnail anytime.
- Use a clear, high-quality image — thumbnails significantly improve click rates.

Step 7: Add a Detailed Description & FAQs
Write a full product description and add FAQs to answer common buyer questions:
- Detailed Description – Explain features, benefits, compatibility, and usage steps. Use headings and short paragraphs to improve readability and SEO.
- FAQs – Cover delivery, refund policy, technical requirements, and support details.

Step 8: Save & Submit for Approval
Click Save to submit your resource for admin approval. Once approved, your product will appear on the marketplace and may be featured.
Any malicious activity, cheating, or spamming will result in strict action against the offender.